Are you thinking of making some for a sweet little one? Would you like to know how I made them? Read on.
The hardest part was finding the right head measurement, since my baby granddaughter is still swimming around in her mommy's womb and not available for a fitting. But after some clicking around on the internet, the consensus seems to be that a newborn to 3-month baby should need a headband that measures about 14 1/2" - 15". So that's what I went with.
The tools I used were a sewing machine (with white thread), glue gun, scissors, and needle and thread.
My materials were simply various stretchy bands and pre-made little fabric flowers from Jo-Ann, that were quite reasonably priced. I also purchased two 7" lengths of wide pleated ribbon to make a couple of my own flowers.
Here's an example of how I made a headband.
1 - First, I measured a 16" ish length of stretchy ribbon. That allows me an overlap of about 1/4" to 1/2" to sew the ends together. Stretchy is important!
2 - Getting ready to sew the ends together, I pinned my ends with a little overlap.
3 - I put my machine in zig-zag mode with a zero-length stitch. So basically, it just tacks it in place. And I tacked it a couple of times.
4 - Next, I simply used my glue gun to glue my little flower over the stitching on the band. Above you see a drop of hot glue on the back of my flower. Press it to the band over the stitching and you see that it hides the stitches nicely. And ta-da! That's it.
Here's my cute little model wearing my creation. That's basically how I made all of the little-flower headbands. Couldn't be easier!
Stay tuned to see how I made the big flowers - it is soooo easy with the right ribbon!
But first, here are some variations of my little-flower headbands.
This one is actually three little rose buds hot-glued together.
Now, for the big flowers! These are so easy!...
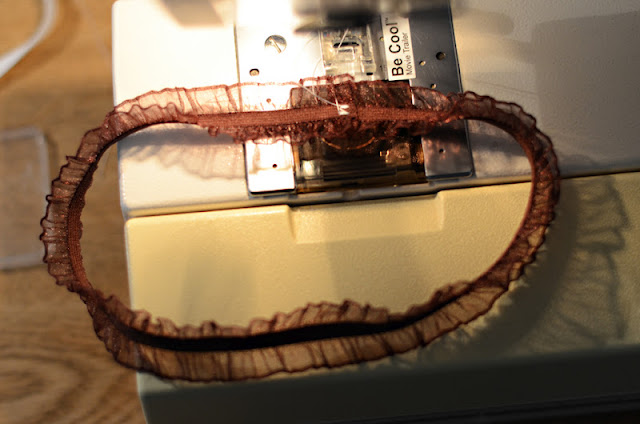
1 - I found some pleated ribbon like this...
This is about 7"-8". That's all you need.
2 - Fold over about 1/4" and secure the ends with hot glue. Above you are looking at the WRONG side of the ribbon.
3 - Starting in the center, spiral the ribbon around in the shape you like. You want the RIGHT side of the ribbon to show. Hold it there with one hand, and get your glue gun in the other hand. Start gluing both in the center front and the back to secure the ribbon in a flower shape. Be careful not to let strings of hot glue land on your flower!
(Above) Here's what it looks like from the back glued together. I just have a little left to do.
4 - When you're done, and while the glue is still warm, mold your flower so it lays flat-ish.
5 - I chose to sew my flower to my headband with a needle and thread, rather than glue it. My band is rather delicate and I thought thread would hold the flower better. Here is the white version of this flower.
6 - To finish the center of the big flower, I glued in a pretty little flower.
And there you have it!
The next version is the ric-rac headband. I really like the green ric-rac and I found the cutest red polka-dot ribbon flower that was pre-made. The problem is that ric-rac isn't stretchy. So my solution is to add a bit of elastic at the back for stretch. I'm taking the chance that my little granddaughter will have hair in the back to cover the elastic portion. We shall see!
Here's what it will look like...so cute...
And here's how I made it...
1 - I measured a length of ric-rac about 15" and then I finished the ends by hot gluing them under about 1/4". Next I cut a piece of 1/8" elastic about 3 1/2" to add some stretch to the band.
2 - Hot glue the elastic to the ends of the ric-rac. It's a little longer than the original 15" measurement - but that measurement assumes there is more stretch. (I can always adjust it for fit when Baby Granddaughter is born.) The elastic portion will be the bottom where the baby's hair will cover it.
3 - In the center top, hot glue your little flower to the ric-rac. And ta-da!
I LOVE the ric-rac look!
There you have it...some fun ideas and easy directions for little baby headbands!
Happy sewing and hot gluing! ~CJ


Oh my! Mom! These are sooo cute! You weren't kidding when you said you went crazy! I love your tutorial and your pics :) I sure hope your granddaughter stays a girl. Can't wait to put these on her sweet head!
ReplyDeleteLook at you making a tutorial! Here I was checking for baby pictures but all I found was a doll with some cute headbands. ;)
ReplyDeleteI'm going to be a first time Grandma of a girl as well! I love your ideas and plan on getting a whole slew ready before the baby comes the end of April. Thank you for sharing!!
ReplyDeleteGood Job!
ReplyDeleteJen @ www.sweetbabybowtique.com
Oh, my goodness...thank you so much for this tutorial, you're going to save me a fortune since I spend about $15- $20 each for headbands I use in my photo shoots.
ReplyDeleteAngela Butler - Clarksville, TN Photographer
Hello,
ReplyDeleteThis girl is very cute. and I love the hair band.
Newborn baby girl tutu dresses